You have some handwraps and some boxing gloves, and now you want to put them to work, right? Well, the first thing you’ll need to do is learn how to wrap your hands properly. In this case, “properly” does not mean “perfectly.” With handwraps, there is no perfect way to do things. “Properly” means safely and effectively. This guide will give you a brief overview of the purpose of boxing handwraps. It will also give you one method of wrapping your hands with either cotton or Mexican handwraps.
Purpose
In short, wraps are worn to align and compact the bones and joints in the hand in order to prevent injury. Competition wraps and training wraps differ greatly. Competition wraps are formed from gauze and medical tape. Training wraps come in three general forms: Cotton, Mexican, & Gel. These three types of wraps vary in several aspects, but all three are convenient and reusable. Cotton and Mexican wraps vary slightly, yet both versions are applied in the same manner. Refer to the guide “Introduction to Boxing Handwraps” in order to better familiarize yourself with the purpose and types of available handwraps.
No standard technique for wrapping hands exists, but this guide will offer a general way that will enable protection, support, and comfort. Gel wraps are pretty self-explanatory, since they slip on like gloves and are secured with Velcro straps. Cotton and Mexican wraps require some assistance. Follow the steps below.
Steps for Wrapping the Hands
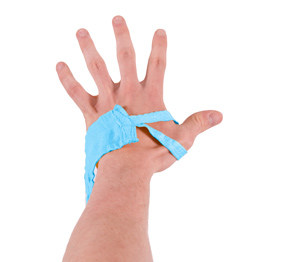
- Spread your hand out in front of you.
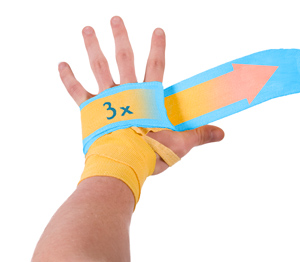
- Find the loop at the end of the wrap and place it around the thumb. Most wraps will denote which side is supposed to face down. Once the loop is around your thumb, you should no longer be able to see the instruction written on the wrap.
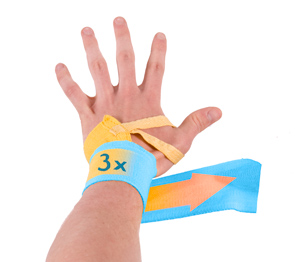
- Wrap it around the back of your wrist three times, finishing on the inside of your wrist.
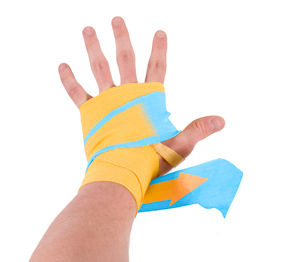
- Move from the inside of your wrist diagonally across the top of your hand.
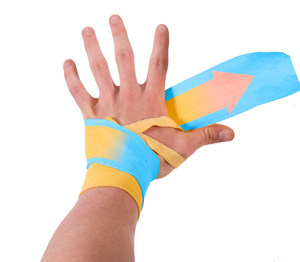
- Wrap it around your hand, from the outside of your hand to the area above the thumb. Do this three times. Finish on the inside near the thumb.
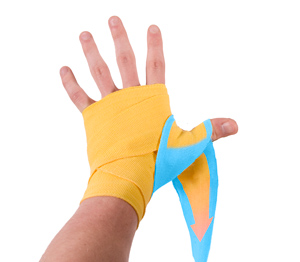
- Wrap it around the wrist once more. Finish on the inside of the wrist near the thumb.
- Wrap the thumb once, moving from the bottom to the top of the thumb and then back toward the bottom again.
- Wrap the wrist once more.
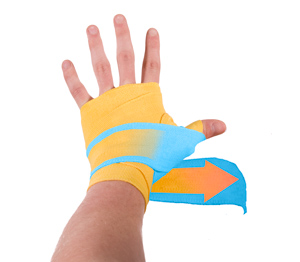
- Move from the inside of the wrist over top of the hand and between the pinky finger and ring finger.
- Move from the inside of the wrist over the top of the hand, but this time go between the ring finger and middle finger.
- Move from the inside of the wrist over the hand one last time, but go between the middle finger and index finger. Finish underneath the thumb on the inside of the wrist.
- Wrap around the wrist once more.
- Move diagonally from the inside of the wrist to the outside of the hand. Wrap around the hand twice, moving from the outside of the hand toward the area above the thumb.
- Continue to wrap once around the hand and once around the wrist until the handwrap has been completely used. Always finish around the wrist.
- Velcro to secure in place.
- Follow the same process with the other hand/wrist.
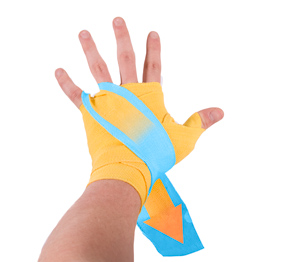
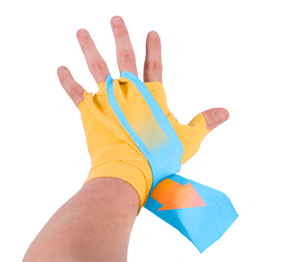
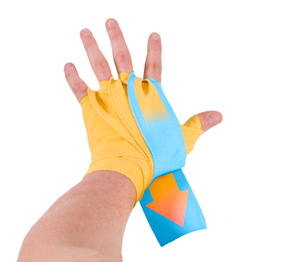
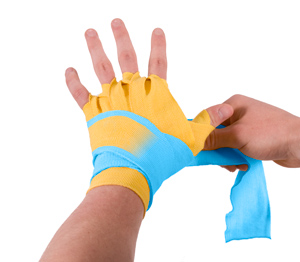
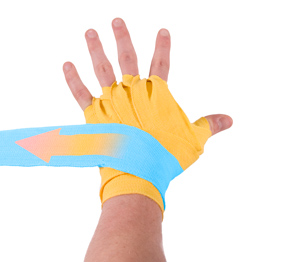
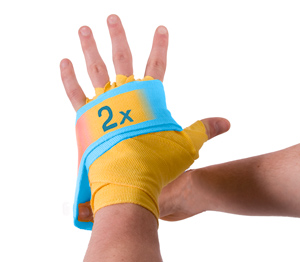
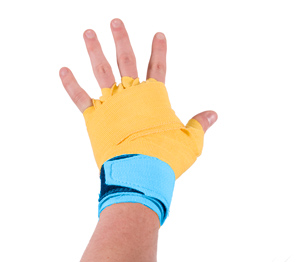
Tight yet Comfortable
You may wonder what a well-fitting handwrap feels like. Your wrists and hands should feel compact. The bones and joints in the hands and wrists should be held together tightly, yet comfortably. If the wrap is too tight, it will feel uncomfortable and you may begin to lose circulation in your hand.
As stated above, there is no “perfect” way of wrapping the wrists and hands. No matter how you wrap, make sure you secure the wrist, thumb, and hand. Handwraps are the first line of defense against unnecessary injury, so never neglect them. Also, be sure to wear gloves in addition to wraps when hitting the heavy bag and hand mitts. The potential for injury will increase if one of these pieces of equipment is overlooked.


