Of all the skills a quarterback is expected to have, none is as important as the ability to accurately throw passes. After all, a functional passing game is crucial to the success of a team’s offense. This guide is an overview of the three most important technical elements involved in throwing a football: Ball Grip, Arm Mechanics, and Body Positioning.
Ball Grip
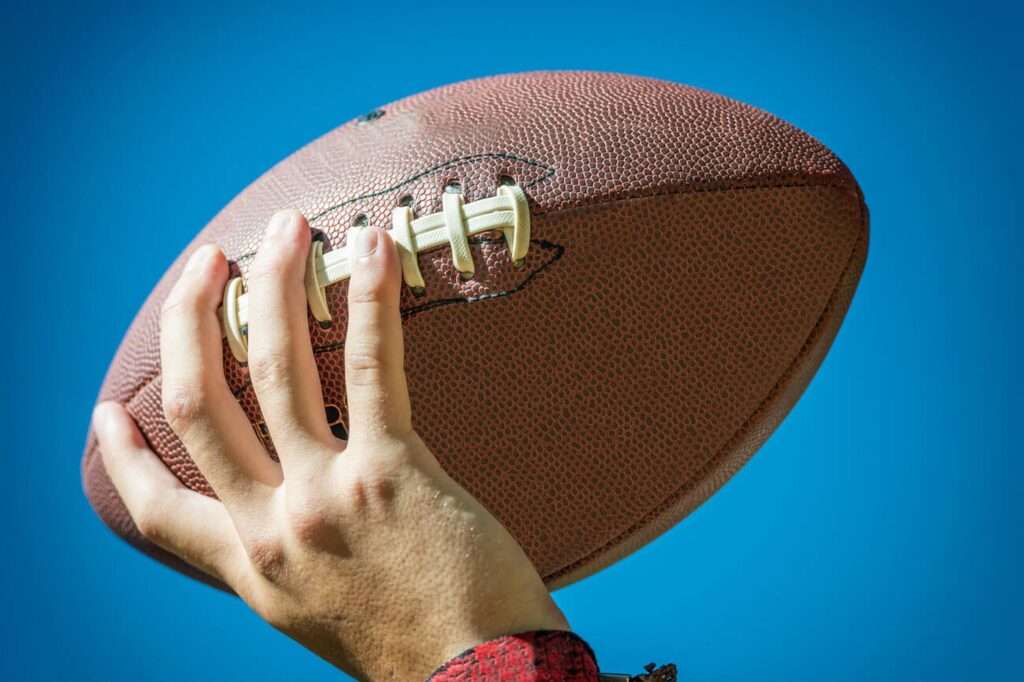
The ability to throw a great pass starts the moment the hand hits the ball. How the ball is held — both in terms of hand placement and grip pressure — will directly affect how well the ball can actually be thrown. It’s also important to recognize that there is not one specific ‘correct’ way to hold a football when passing it.
Brett Favre keeps the index finger of his throwing hand directly on the point of the ball, while Drew Brees has his middle, ring, and pinky fingers securely on the laces of the ball. Much like holding a pen, most grips are relatively similar; the important thing is to make sure your grip is secure, and allows you to control the ball as it’s thrown.
Here are some things to keep in mind when determining how the ball should be gripped:
Proper grip is determined by hand size:
The smaller the hand throwing the ball, the closer the grip should be to the point. Because the circumference of the ball gets smaller at the points, it’s easier to grip. People with bigger hands would do well by keeping their grip on an area closer to the middle of the ball.
Make the ‘C’:
On the throwing hand, form a ‘C’ shape with the thumb and middle finger; the thumb/middle finger pair forms the center of the grip. This ‘C’ is the center point of the grip, and should be positioned so the middle finger rests somewhere close to the laces (with the exact position depending on the size of the hand). When holding the ball, the middle finger and thumb should be almost perfectly parallel with each other, the finger on top of the ball and the thumb on the bottom. The index finger should be angled towards the point of the ball, and the ring and pinky fingers should rest on (or towards) the laces of the ball.
Keep the window open:
When holding the ball, there should be a small gap, or window, between the ball and the spot on the hand where the pads of the palm meet. If a gap is there, it means the majority of the grip is being maintained by the fingertips, which is optimal. If it’s closed, it means the whole hand is resting on the ball, which will make it difficult to control the direction of the pass when it’s made.
One of the most common misconceptions about throwing a football concerns the strength of your grip. Gripping the ball tightly or with the entire hand will hinder your throw more than it will help it. Keep your grip secure but relaxed; most of the pressure should come from the tips of your fingers and thumb. This will dramatically increases the amount of control you have over guiding the ball to its desired target.
Arm Mechanics
Moving from the grip, the next key throwing element is the actual movement of the hand and arm during a pass. Considering how it looks when a football gets thrown, it’s not surprising that most people without much experience who attempt a pass try to ‘push’ the ball through the air. In actuality, the proper arm motion that occurs when a pass is thrown more resembles a whip or sling action.
Much like gripping the ball, there are different ways of actually moving your arm that can all result in a successful pass. However, unless your name is Peyton Manning it’s probably not a good idea to start making up your own technique just yet. Here are a few general steps that should be followed to ensure a high number of successful passes (beginning at the start of the actual movement of the pass):
Throw in a half-circle motion:
Starting with the ball behind the throwing-side ear, your throwing arm should make the shape of a half circle when the ball is thrown, ending with the throwing hand pointed straight at the target (for a split moment … see the third point). This will ensure the ball goes toward its target.
Release and spin:
Properly timing the release of the ball has the biggest impact, and also results in the all-important spiral. Depending on how far/hard the throw is, the release point should start somewhere near the very top of the half-circle motion. When releasing the ball, the thumb should lose contact first, and the fingers should quickly roll downward as the ball leaves them. Aside from making a pass look good, the spiral also dramatically increases the accuracy of the throw.
Follow through and rotate:
The throwing motion shouldn’t stop exactly as you reach the end of the half-circle shape. As a result of the finger roll, the throwing hand should rotate so the palm faces outward, and come to rest near the hip opposite to the throwing arm.
It’s important to remember that these parts come in rapid succession, and that they all work together to make a pass accurate. Improving one part will certainly improve your ability to pass, but each of them is as important as the others.
Mental Edge: Precision Passing
Though the follow-through and rotation are important, the two biggest factors that determine how the ball gets passed are the half-circle throwing motion, and the release point.
- The size of the half-circle determines the momentum behind the pass: A bigger circle means more momentum and a longer pass; a smaller circle means less momentum and a shorter pass.
- The release point determines how high the ball will fly: An early release point results in a pass that flies high, but doesn’t go as far; a later release point results in a pass that stays low, but drops quickly.
By experimenting with half-circle size and release point, you can better understand how to increase your ability to accurately throw different kinds of passes.
Body Positioning
While not quite as important as the grip and throwing mechanics, properly positioning your body before and during a throw can easily add that little extra bit of improvement, moving you from ‘good passer’ to ‘great passer.’ Here’s a list of ways that proper body movement can improve your passing ability:
Before the Pass
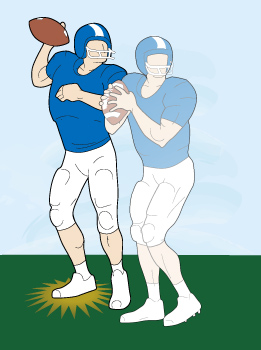
Start with the throwing shoulder turned away from the play, and point the non-throwing shoulder at the target. Keep the legs in line with the shoulders. This alignment will help with the accuracy of the pass.
- Hold the ball in both hands, next to the ear closest to the throwing shoulder. Using two hands helps maintain a secure grip on the ball, and holding it by the ear puts the ball in a good place from where the throw should begin.
- Keep the elbow of the throwing arm above the shoulder of that same arm. This will also ensure that the throwing motion starts from a good position, and that the ball flies accurately.
Immediately before you start the throwing motion, shift most of the body weight to the back foot. As you pass the ball, you will shift your weight forward, which adds momention (distance and power) to the pass.
During the Pass
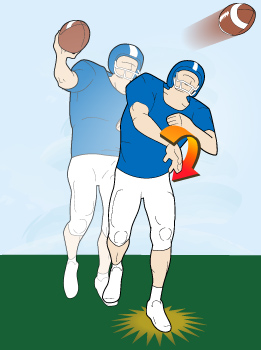
As the ball is thrown, rotate the hips and shoulders in the direction of the pass. This is a very easy way to add more momentum to the pass without relying just on arm strength.
Shift the weight from the back foot to the front foot. Again, this will add additional momentum to the pass, but it will also ensure that the ball flies more accurately.
A common quarterback mistake is throwing a pass from the back foot, which results in a lofty pass that’s easier to intercept. By shifting weight from the back foot to the front, it helps the ball’s trajectory stay low and accurate. Body positioning won’t have quite as much effect on your throw as the grip and arm motion will, but working on these techniques will go a long way to improving your ability to throw farther and with more accuracy.
Like Gears in a Clock
To be a great passer, it’s vital to recognize that there’s more to passing than simply throwing a football as hard as possible. Recognizing how each of these pieces works, and how they all work together, will make it much easier to improve as a passer.

